Workaround for Shared Folders in VirtualBox with Windows 7 !!!
So, what's not working? Well, you set the folder(s) in the "Shared Folders" section of the virtual machine's settings dialog and they will NOT appear in Windows 7, like it works with Windows XP.
Like many of you out there, I've searched and searched on the Internet for a solution to this issue, which I've also noticed to be quite popular (why should it be? you create something on the virtual machine and you want to save it, right?), and many guides are incomplete or they point you in the wrong direction. Therefore, I present today a step-by-step tutorial (with screenshots) to this very simple-to-fix issue (you won't believe how simple it was in the end).
For this tutorial, we've used VirtualBox 3.0.6 and Windows 7 Ultimate, on an Ubuntu 9.10 Alpha 6 machine. The following steps assume that you do NOT have any shared folders added to your Windows 7 virtual machine. If you already have set the folders, just follow the last three steps!
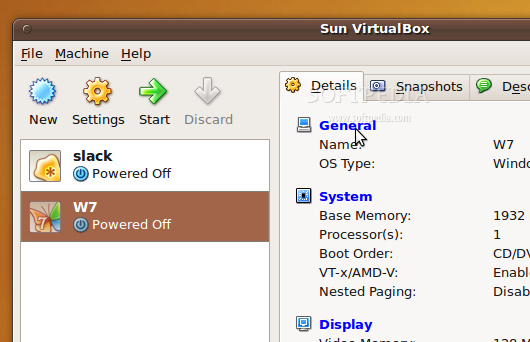
1. Open VirtualBox, and with the Windows 7 virtual machine selected in the left side, click the 'General' button on the "Details" tab.
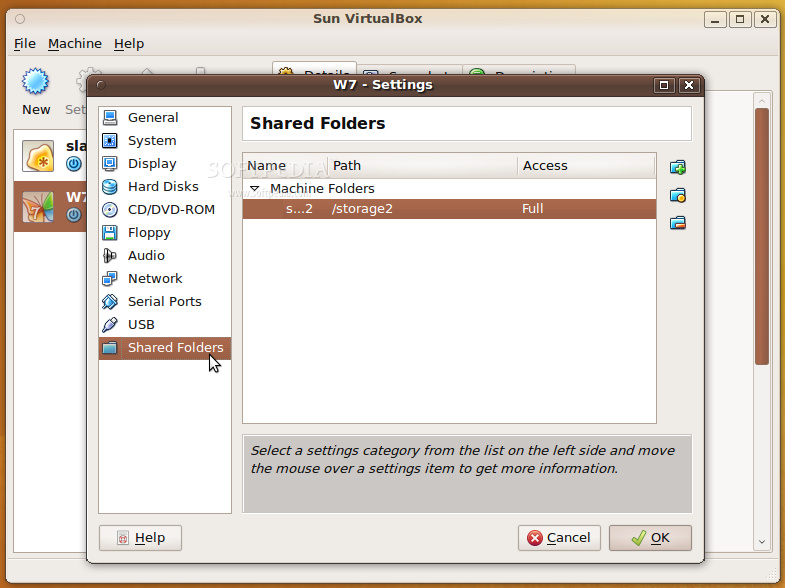
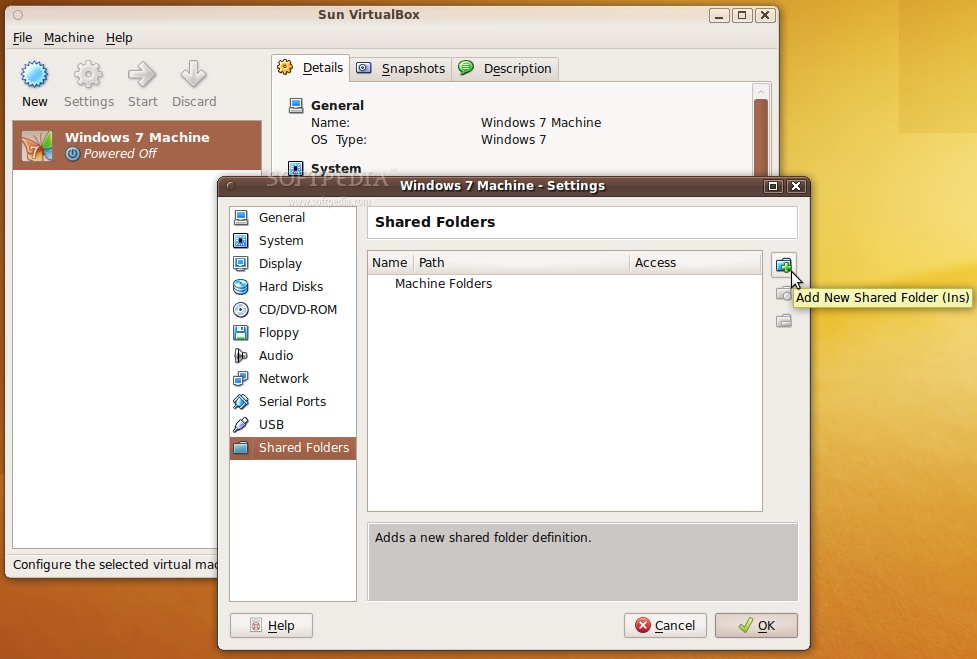
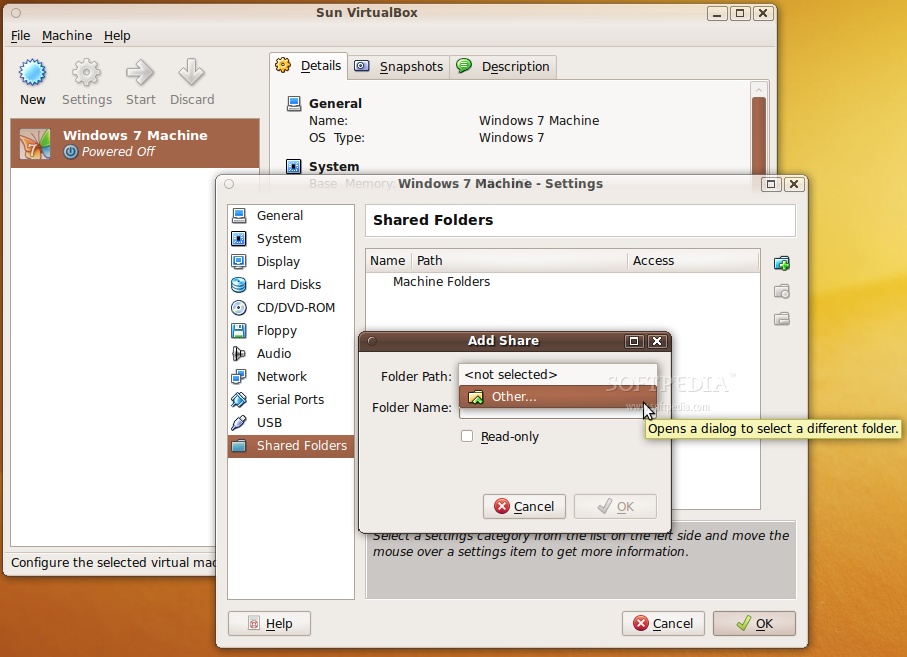
2. In the settings window that appears, click the "Shared Folders" entry (last one) and then click on the little folder icon with a + on it (on the right) to add a new shared folder...
3. A new dialog appears, called Add Share. Click the arrow on the "Folder Path" field and select 'Other.' Search for the folder you want to share with the Windows 7 virtual machine and click OK...
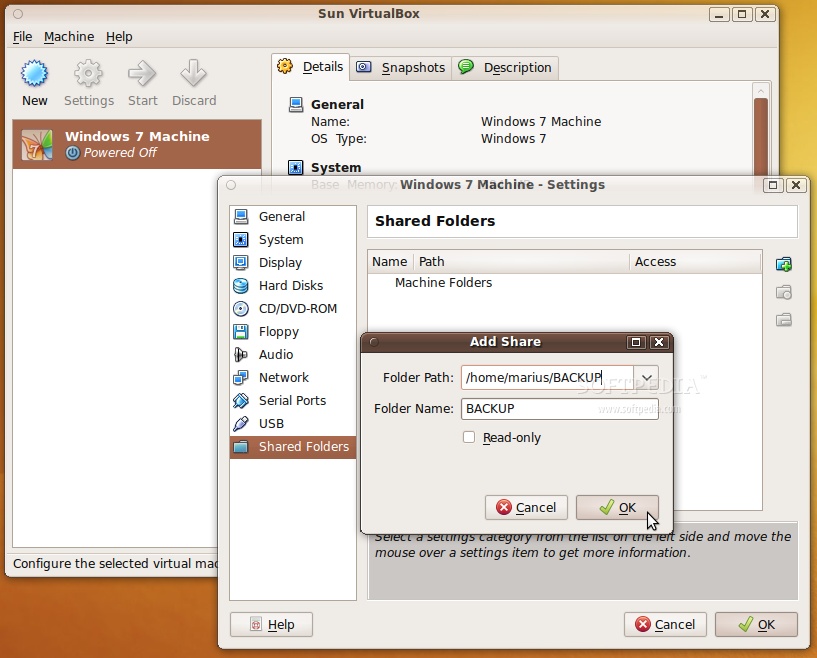
4. You will now see the full path to the folder you want to share and you can give it a name or just leave it as it is. Click OK to close the "Add Share" dialog...
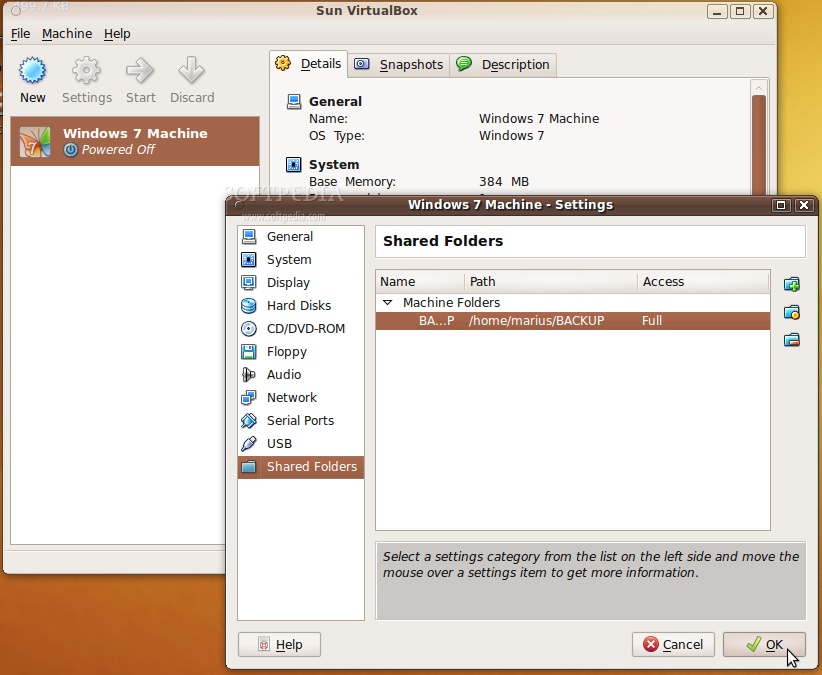
5. You will now see the folder in the "Shared Folders" section. Click OK to close the settings dialog...
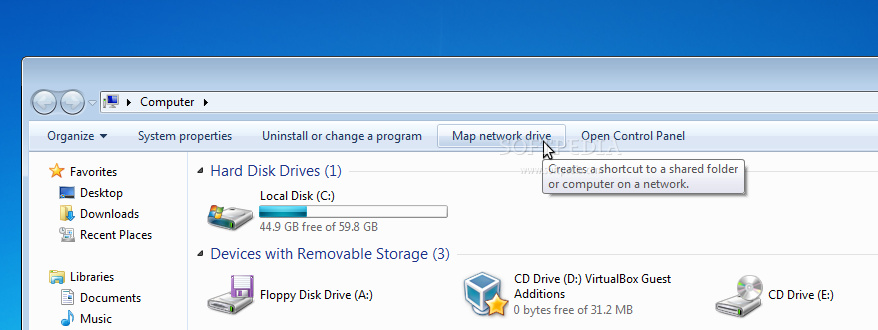
6. Now, start the Windows 7 virtual machine. When the system is fully loaded, open My Computer and click on the "Map network drive" button...
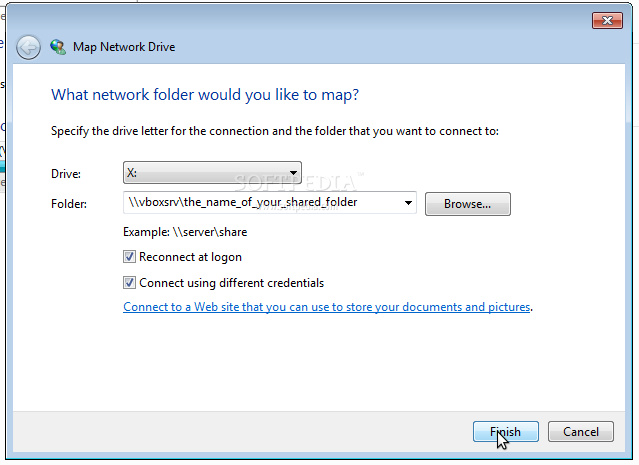
7. In the new window that appears, select a driver letter on the "Drive" field (any letter you want from the list), and... here is the big secret... type \\vboxsrv\ followed by the name of your shared folder, in the "Folder" field!
Also, don't forget to check the "Connect using different credentials" option either.
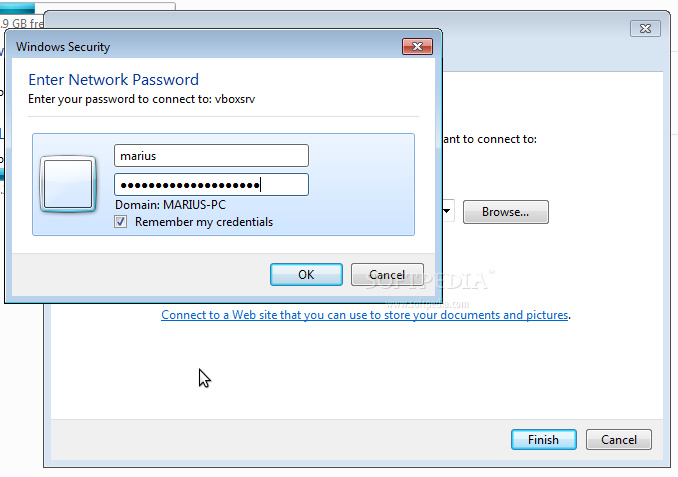
After this, click the "Finish" button and you will be prompted to insert the username and password of your Linux machine. Check the "Remember my credentials" option and click the OK button...
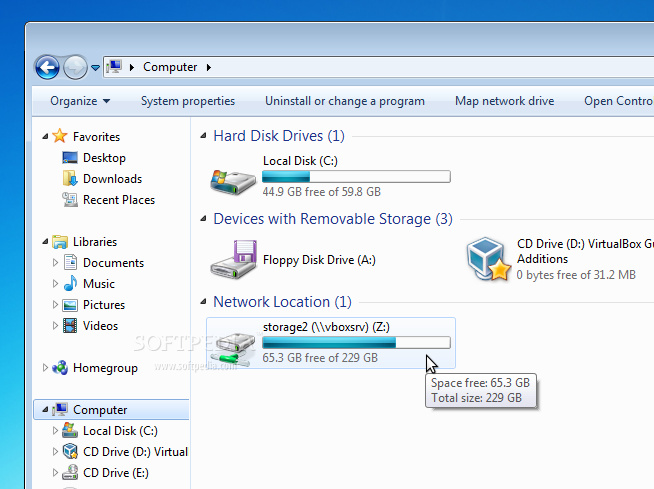
You can see your shared folder in the My Computer window, under the Network Location section... and it also shows how much space is left on the drive...
Simple, wasn't it?!
PLEASE POST YOUR COMMENTS ON lifeisbeautiful0505@gmail.com